Curried Vegetable Soup (spicy)


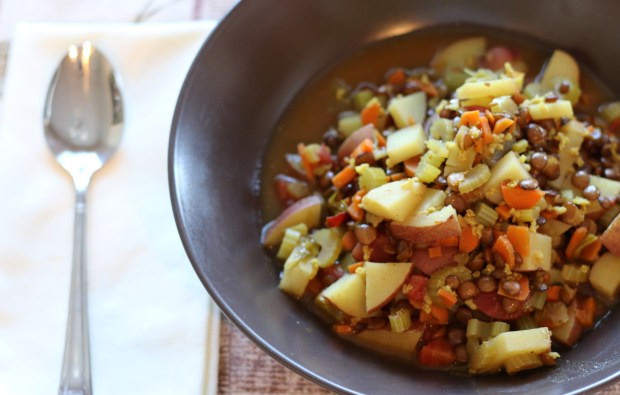
Hearty and warm, this soup will sustain you through a cold, wintry day.  It has 22 ingredients (give or take) and a host of options if you do not favor one of the vegetables.  Reduce the amount of the peppers if you need to tone down the spice level of this delicious soup.  I have greatly modified the original recipe… you could try your own variations if you feel adventuresome.

Indian Stew (3)

1     c lentils (any variety)
1/2 c dry millet
6     T olive oil
1     onion, chopped or 1/2 t. dried onion powder
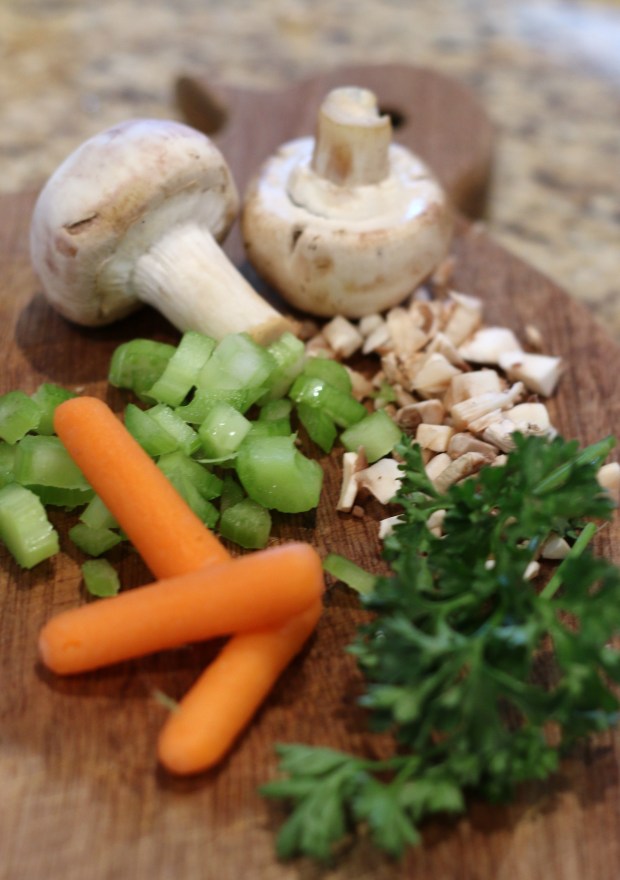
4     celery stalks, chopped
2     large tomatoes, chopped or 1 can chopped tomatoes
4     garlic cloves, minced
10   mushrooms, chopped
7-10 baby carrots, chopped small
5     red potatoes, cubed
1     inch piece of fresh ginger grated or 1 toothpick dipped in ginger essential oil
2     t turmeric
4     t celery seed
3     fresh green chilies, diced
1/2 t black pepper
2     T curry powder
2     T coriander powder
2     t ground cumin
1/2 t cayenne pepper
3     T fresh lime juice
14   c water or vegetable broth
1     large handful fresh parsley, chopped

IMG_0801

Indian Stew (8)
~ In large stock pot heat olive oil on medium
~ Add: onion, carrots, celery, garlic, ginger, cumin and stir fry 3-4 minutes
~ Add chilies, cayenne pepper and stir for 1 minute
~ Add all other ingredients except lime juice and parsley and bring to a boil
~ Reduce heat, cover, and cook 20 minutes
~ Stir in lime juice and simmer, uncovered for 15 minutes
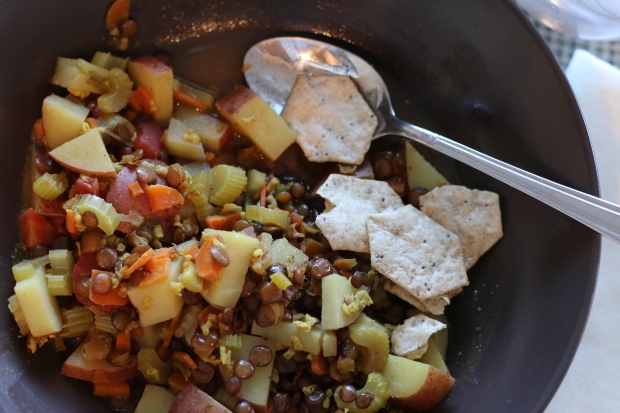
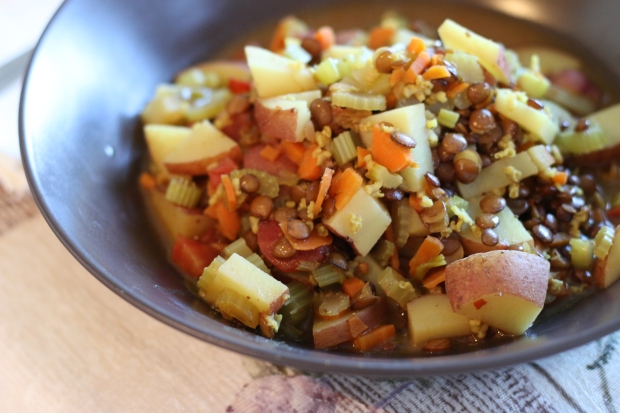
~ Add chopped parsley and serve warm

Indian Stew (5)
TIPS:
~  Follow the recipe as closely as possible the first time and then get creative thereafter.
~  Be sure to infuse the spices in the oil first as directed- it is one of the key ways to build the hearty, roasted flare to this dish.
~  Add 1 cup chopped  raw broccoli and or 1 c frozen or fresh green peas.

CREDITS: Sharon Keller

Mini Pumpkin Pies


So cute and equally delicious, these little pies are easy and fun to make.  There is no dairy in the pies and if you had a mind to, you could make a gluten-free crust for those in your family with allergies.  When cooked in tiny souffle dishes, you could even make them crust-less if needed.
mini pies_03 cr
Get creative; you do not have to give up all your traditional foods even with allergies!
FILLING
2 3/4 cups pumpkin puree (make your own or about 1 1/2 15-ounce cans)
1/4    cup real maple syrup
1/4    cup organic brown sugar or coconut sugar
1/3    cup unsweetened plain almond milk
1        Tbsp melted coconut oil (or olive oil)
2 1/2 Tbsp arrowroot starch (or cornstarch)
1 3/4 tsp pumpkin pie spice (make your own with recipe below)
1/4    tsp sea salt
CRUST
Use your favorite pie crust recipe (store-bought pre-made crusts will work in a pinch)
TOPPING
Fresh whipped cream, plain, or topping of your choice!
PUMPKIN PIE SPICE
2 tsp ground cinnamon, 2 tsp ground ginger, 1 tsp ground nutmeg, 1/2 tsp ground cloves; mix well and keep in a small jar.

  1. Preheat oven to 350 degrees F.
  2. Add all pie filling ingredients to a blender and blend until smooth, scrape down sides if needed.  Set aside.
  3. Prepare crust. (If you are making your own, you will need enough for two traditional crusts.
  4. Roll out your dough into a circle about 1/4-inch thick. Be careful not to get it too thin.  Cut 12 circles with a bowl or cookie cutter 3 1/4-inch in diameter.
  5. Use your spatula to lift the crust, then carefully lay into muffin tins. Fold and tuck edges to accommodate the shape. Carefully form the crust with your hands without stretching the dough.  Fill all 12 tins.
  6. Spoon filling into pie crusts 3/4 full.  I gently leveled mine with a spoon.
  7. Bake at 350 degrees for 40-50 minutes.  Crust should be a light golden brown and the filling will be slightly cracked on top.
  8. Remove from oven and let cool completely before serving – about 2-3 hours. Serve at room temperature.
  9. If you need to make these the night before, cover with plastic wrap, and chill in the refrigerator overnight.  They will keep 2 days, but best eaten fresh!mini pies_04CREDITS: modified from Dana at Minimalist Baker; photos Sharon Keller.

Roasted Chick Peas


Roasted Chick Peas

Need an appetizer for your guests?
Want a zippy snack to stave off the hunger pangs?
Try some Roasted Chickpeas.

I recently took these to a small gathering of people who included Cubans, Americans, Chinese, Nicaraguans, Russians, children, and adults.  I was pleasantly surprised how well-received they were.  They do add a bit of zing to your taste buds with all the spices roasted on them, so I made sure those eating knew they were a little spicy by adding a little flag to the dish.

Some of the guests tossed a few on top of a simple pasta salad that was served and    commented to me afterwards what a nice addition that was.  (:  They aren’t difficult to make.  I hope you enjoy them!

Flagged for guests who don’t care for spicy

Ingredients for snack:
2    cans chick peas (garbanzo beans) 15 oz. each
1    TBSP Cajun seasoning (see below)
1    TBSP garlic powder (optional)
Cooking spray (non flavored)

Ingredients for Cajun Seasoning:
1    TBSP salt
1     ”         oregano
1     ”         cayenne pepper
1     ”         paprika
1     ”         ground black pepper
1     ”         celery salt
1/8  tsp  white pepper
1/4  tsp  sage (optional)

~   Put all ingredients in a small container with a lid or a small ziplock bag and shake well.
~   Store as you would other spices

just waiting to be mixed!

~  Drain chick peas in a strainer (do not keep liquid) and rinse with cool water.
~  Drain well while you prepare everything else.
~  Heat oven to 350*
~  Spray a rimmed cooking sheet or baking dish with oil
~  Pour Chick Peas on pan and pat lightly with a paper towel to remove any excess water.
~  Spread in a single layer, spray with oil and shake pan gently to coat with the oil.

ready to season

ready to season

~  Sprinkle Cajun seasoning (and garlic powder if using) over peas; gently shake pan so that the spices coat the peas.
~  Roast for 45 minutes; shake pan or gently stir every 15 minutes so the peas do not burn.  Cook until brown and crispy.

Yummy!

TIPS:
~  Store in airtight container.  Eat within 3-4 days.

CREDITS:  Chick Pea recipe adapted from ‘Mama’s Kitchen’;  Cajun Seasoning recipe adapted from allrecipies.com:  photos, Sharon Keller

Mexican Tilapia


Fresh herbs or dried herbs that I can grind myself are my preferred choice when cooking.  There is just something special about having fresh-ground herbs added to the ‘pot’.  I also am not a fan of recipes that insist on a particular brand of ingredient because that often becomes restrictive or cost-prohibitive.

Recently I was given a bottle of herbs and have been experimenting with them in my kitchen.  I have liked the results so well, I am suggesting that you actually buy this brand of pre-ground herbs (gasp) for this recipe– there, I said it.  🙂

The company did not ask me to promote them or this blend of herbs; I simply think it is worth adding to your pantry.  (There is not a detailed list of all the ingredients of the blend on the bottle, but with some experimentation, you might be able to recreate it yourself and not be stuck with having to purchase a certain brand.)

The result of this tilapia was mild and well-blended, but quite flavorful; so yummy I just had to share it with you.
I will include the link for the spice company at the end of this post, but now for the good part… Mexican Tilapia!

not spicy; just flavorful!

For every 2 fish steaks you will need:

1/2 tsp.   Mexican Seasoning  (you can adjust to your taste) (Epicurean Organics)
dash          black pepper
4 TBSP     plain dried bread crumbs (or plain stuffing mix crumbs)
1/2 tsp    salt
2 TBSP     milk or rice milk
oil

~  Place all spices and breadcrumbs in a plastic bag; shake well.
~  Spray cast iron pan with a little oil and turn stove on medium heat.
~  Dip fish in milk and place in bag; shake gently until fish is completely covered in mix
~  Place fish steak in hot pan.
~  Repeat with other fish pieces and cook until flaky (turn only once).

pan fry in very little oil

~  Watch the fish carefully.  I added a small amount of olive oil to the bottom of the pan part way through to give it added crunch.
~ Depending on the thickness of your fish, it should take about 5-7 minutes per side to cook.
~ Serve immediately with your favorite side dishes

TIPS:
http://www.mountainroseherbs.com/epicurean/seasoning.php

CREDITS:  Recipe and photos, Sharon Keller

Murkha Dal (Lentils)


red lentils

If you are not a lentil fan or have little experience cooking with them, you really must try this recipe.  If you already recognize the benefit of lentils- both in nutrition and price, you may find this to become a favorite among lentil dishes as we have.

Legumes (pulses) such as lentils are excellent complex carbohydrates.  They do not turn into all sugar such as simple carbs and have great fiber benefits as well.   In any case, the versatility of Murkha Dal and lentils in general is a bonus to my simple kitchen.

Murkha Dal

This version of lentils is on the thick and hearty side.  Though it is suggested to eat on top of rice, these lentils can be easily eaten with flat breads such as pita or naan.


1/4     cup butter (unsalted)
2          tsp. black mustard seeds
1          onion, chopped well  or 3 green onions snipped into small pieces
2          garlic cloves, minced
1          Tablespoon grated ginger root  or 1 tsp. ground ginger
1          tsp. turmeric
2          green chilies finely chopped (Serrano works well)
1          cup red lentils (sometimes called Masoor)
4         cups water
1 1/4 cup coconut milk (canned, not sweetened)
1         tsp. salt

~  Melt butter in a large sauce pan on moderate heat.
~  Add the mustard seeds; cover pan.
~  When you hear the seeds begin to pop, turn down the heat, and add onion, garlic, and ginger.
~  Cook uncovered about 7 minutes until garlic is brown.
~  Now stir in turmeric, green chilies, stirring frequently until lentils begin to turn translucent (about 2 minutes).

stir

stir in the lentils

~  Add water and coconut milk, and salt.  Stir well and bring to boil.
~  Reduce heat to a simmer, cooking for 40 minutes.
~  Serve hot over rice or eat with flat bread.

cooking dal

Looks are deceiving this is very flavorful!

bubbly dal

Coconut milk gives these lentils a hearty flavor

TIPS:
~  Other lentils may be used.  Red lentils cook down and take less time to cook; brown and green lentils tend to stay whole and separate.
~  Don’t leave out the chilies, but be very careful cutting them. Wash your hands immediately very well.  Chilies can be cut ahead and frozen for several months for this recipe.
~  This can be made with only water.  While it will affect the taste without the coconut milk, it is even more nutritious without the milk.
~  There is no nutritional need for meat with this meal, but baked or roasted chicken along with the bread or rice will probably please your meat-eaters in your family.
~  This recipe is suitable for freezing.  Divide any remaining lentils into portions sized appropriately for other meals.  Thaw and reheat.  We like this the second time just as well!

CREDITS:  Cara Hobday; Sharon Keller

Spiced Baby Reds


These potatoes will not win any beauty contests but they will leave your mouth with a flavor to remember.  This spice blend is not for the bland-at-heart so if young children are eating these delicious potatoes, be sure to taste them first to see if they are too hot (spicy), or cut back a little on the chilies when cooking.

Pair these Baby Reds with a simple roasted chicken, other vegetables, lentils, or dried beans and let them steal the show. 
Let me know how you liked them.

20-25 new potatoes or baby red potatoes (small enough to roast whole)
2           teaspoon cumin seeds, ground
2           teaspoons coriander powder
1/4      cup butter
1           teaspoon ground turmeric
1           teaspoon black mustard seeds
2           garlic cloves, crushed
1/8      teaspoon crushed red pepper flakes or 2 dried red chilies
              salt to taste

~  Preheat oven to 400
~  Wash potatoes well and pat dry
~  Grind cumin and crush garlic
~  In a roasting pan (or other pan with sides and big enough for the potatoes to remain in one layer) melt butter briefly
~  Add all spices, garlic and salt to butter and stir until spices are blended. 
~  Heat in oven for 4-5 minutes
~  Remove from oven and add the potatoes.  Stir well until each potato is covered in the spiced butter mixture.
~  Bake 20-25 minutes or until poked easily with a toothpick.  Stir potatoes twice in the baking process so that they remain covered in spices.
~  Serve warm.

spiced baby red potatoes

TIPS:
~ I like to use a mortar and pestle to grind my spices. In this recipe make sure you grind them before you crush the garlic; this keeps the spices from getting ‘wet’ and sticking to the mortar and pestle.
~ If your potatoes turn out more spicy/hot than flavorful, try adding a little more salt.
~ Try substituting carrots or turnips for the potatoes. You will need to cut them into manageable chunks about 1 inch squares.

CREDITS:  Adapted from ‘Indian Side Dishes’, p.24; photos Sharon Keller

Spiced Cauliflower


Add some beauty to your table with this delicious cauliflower covered in wonderful spices.  The turmeric gives the cauliflower a lovely make-over from its natural color of white, added with other spices for a delicious new way of eating this great vegetable. 

Try it with an array of other vegetables for an all-vegetable plate or add it next to some baked chicken and green beans.  Take it to a picnic or accompany it with a meal of rice and lamb.  It isn’t difficult to make– make it with your favorite meal and then let me know what you ate with this delightful cauliflower.

Spiced cauliflower

1   pound cauliflower cut into florets
1   Tablespoon olive oil
3   garlic cloves pounded in a mortar & pestle
1   teaspoon turmeric
1   teaspoon cummin seed, ground
1   teaspoon coriander
1   teaspoon black or yellow mustard seeds
3   green onions, washed and snipped into small pieces
1/4 teaspoon fresh ground black pepper
salt to taste

black pepper, coriander, garlic, turmeric, black mustard seeds, cummin seeds

~  Cut up cauliflower, blanch four minutes, drain, and set aside.
~  In a heavy skillet (or wok) heat oil on medium.
~  Add everything except cauliflower and onion; stir well and cover the pan.
~  The mustard seeds will start to pop.  This is the time to add the onion and stir constantly until they soften.
~  Add salt and cauliflower. Stir for four minutes on meduim-high, making sure it gets well coated with all the spices.
~  If the cauliflower is still hard, you can add 1/4 cup water and cover the pan for two minutes, but this should not be necessary if you blanched the cauliflower well.
~  Test for adequate salt and serve warm.
CREDITS:  Sharon Keller, adapted from Indian Side Dishes, p.27

Indian Eggs


The challenges of cooking on a kerosene “stove” (a one-burner, round contraption about 18 inches tall with 10 wicks soaked in kerosene), with no electricity or just a small candle while wrapped in a sari, was a huge motivator to cook simply while I was serving in India.  The lack of a refrigerator also motivated me to learn to cook for just that day.  This recipe for Indian Eggs is one of those fun ideas God gave me to make my life a little simpler.

Getting the eggs home from market was a task since there were no egg cartons or devices provided by the “shop” owner to transport them home.  I would bring a little mesh bag, and slip the 4 or 5 eggs I had purchased, down inside.  After climbing up into the rickshaw in my sari, I would press my toes against the floor of the rickshaw to brace myself from the bumps and turns, hold the loose end of my sari in one hand to keep it from getting caught in the wheel of the rickshaw, and hold my eggs up in the air with my other hand trying to keep them from getting bumped or cracked. (Someone really should have made a video of this.)

When finished boiling the eggs on the kerosene stove, I would peel the eggs and lightly fry them in Indian spices. I could then set them aside for a spell while I made our dinner on the kerosene stove in the dark. They were a tasty addition to many different meals.

These are not complicated and I have given them a simple name.  Add them to your table when you make a baked chicken, a simple rice dish, or alongside other vegetables. They are quite versatile.

fried Indian Eggs

Eggs
1 Tablespoon Oil
1 Tablespoon ground Indian-loved spices such as:
turmeric, coriander (dried, ground cilantro), cummin, fenugreek, ginger, mustard seed, cayenne pepper
* Baida makes a blend of similar spices called “Curry Powder”.  Look for it or something similar at your store for ease of making these eggs.

~  Boil eggs; cool and peel
~  Cut in half lengthwise and set on a plate
~  In a medium fry pan heat oil just below medium heat (too hot and the eggs will stick!)
~  Add 2-4 teaspoons of ground spices and a dash of salt and mix with the oil
~  Carefully lay each egg yolk side down in the hot oil
~  Fry gently for 2 minutes and turn over with a spoon
~  Fry the second side 2 minutes and transfer to a pretty serving dish

TIPS:
~  If using as a side dish with other meat, cook one egg per person; if using as your main protein along side of rice, lentils, beans, or vegetables, cook two eggs per person.

CREDITS: Sharon Keller